Category Archives: How it is DONE

Here is where we show you some of our sign and plaque making techniques. If you pay attention, you might even figure out a couple of our little secrets.

Learn how Atlas Signs and Plaques adds the natural patina look making plaques appear to have been around for a while. See how to place and mount your plaque, and get the skinny on our innovative ideas and methods

How to Pack a Sign for Return Shipping

Once in a while we have a customer that needs to return a sign to us, and occasionally that sign doesn’t make it to us safe and sound. We know our customers mean well and try their best, but to make it even easier we thought we’d share with you a step by step guide to proper sign packing for shipment, the Atlas Signs and Plaques way.

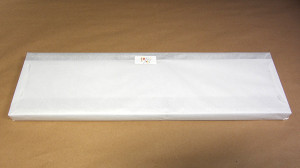
The first thing you’re going to want to do is wrap your sign in something to protect it from scratches. We prefer a double layer of tissue paper (this also keeps the bubble wrap from sticking).

sign wrapped in tissue paper


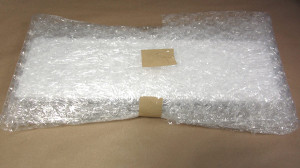
The next step is to cover the sign in bubble wrap, paying special attention to the edges as this is where damage is most likely to occur. We recommend using a double layer, because you never know when one of those bubbles is going to take the day off.

sign in bubble wrap


Continue reading

Love This? Go Tell it on a Mountain!

Why Do Custom Finishes Have Variations

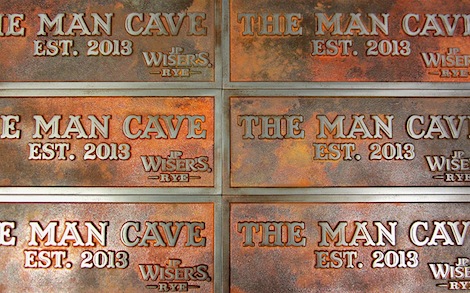
Variations in Iron Rust FinishAnswer: Because they are Handcrafted.

All signs and plaques from Atlas have some variances in the final product. These wonderful indications of hand finishing are most prevalent on Copper Verdi, Bronze Verdi, and Iron Rust.

The photo above is a really good representative photo of how custom finishes vary from piece to piece. These Man Cave Signs are all the same except that each one is different from the one right next to it. For more cool Iron Rust Photos visit the Atlas Pinterest Iron Rust Board.

They were all completed on the same day within a very short time span. The process used to patina the iron into the “aged look” was the same on each plaque. So how can each on be different? The patina process contains several steps and several different compounds. Each of these are applied by hand and therefore are not exactly the same.

Additionally, the final polishing step is 100% by hand allowing for even more of the character that we desire.

All metal finishes from Atlas are what we call “Living Finishes“, meaning that they change naturally over time. While all finishes are “Living”, the Verdigris and Iron Rust finishes are more alive than the others.

We hope this was helpful. Here are more information on Real Metal Finishes from Atlas Signs and Plaques.

Love This? Go Tell it on a Mountain!

When Should I Order Address Numbers for a New House or Remodel Project?

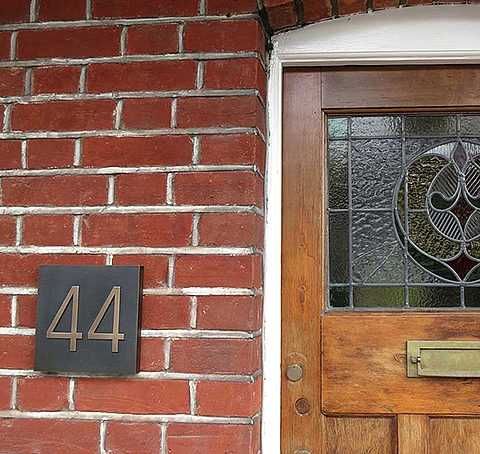
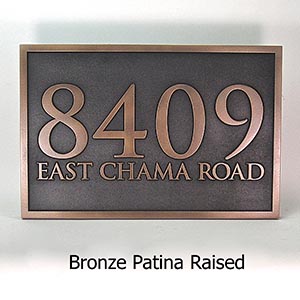
Address Number Plaque easily surface installed on brickOrdering the Address Number Plaque for your new home or your remodeling project is strictly a matter of timing

One might think that placing the all important address numbers on your home would be the last thing to do before calling it “done” and moving in. This is really never the case, so consider the following.

Who is going to mount your address number plaque and where will it be placed? If the address plaque will be mounted on siding, it will be attached by the general or finish contractor after the siding is installed. But if will be mounted on or in brickwork or masonry, then the masonry contractor probably should be involved so she can incorporate the plaque into the brick pattern for a great preplanned look. Even if the plaque will be surface mounted, it is easier for the contractor to drill the appropriate holes and complete the installation.

How to mount your address plaque on any surface

But have no fear if your contractors have abandoned you. Signs and Plaques from Atlas Signs and Plaques are designed to be mounted using several different methods depending upon location and surface. All methods are well within the capabilities of most homeowners.

There are some compelling reasons to install your house identification as soon as possible though. You will want contractors, building inspectors (ugh), and the cable guy to be able to find you. And, in the case of a fire or accident, you won’t want rescue workers to be delayed.

Bottom line is to order your house number plaque as soon as you decide on a style and finish, and install it as soon as possible taking in to account the chance of damage from careless workers.


Love This? Go Tell it on a Mountain!

Another Option for Sign and Plaque Installation: Fence Post Mounts

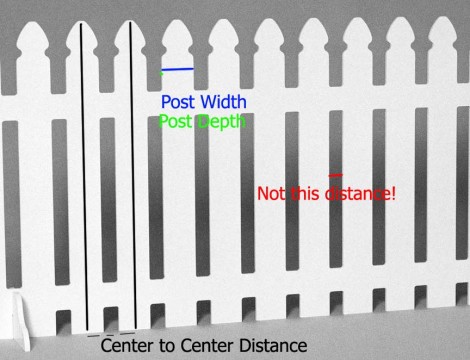
Diagram of how to measure to mount a sign on a fence

Measure Twice

How do you show the world your new sign?

The answer is to mount it where it will be easily read and understood. Often that means on a fence or a post.

Of all the sign mounting methods offered by Atlas Signs and Plaques, the one that seems the most vexing is mounting to a fence or post. Not that it is difficult, but there are terms used that are just not part of our everyday jargon. Additionally, there is the requirement to measure carefully so that Atlas can install the mounting hardware correctly. So, get out the trusty tape measure and go for it.

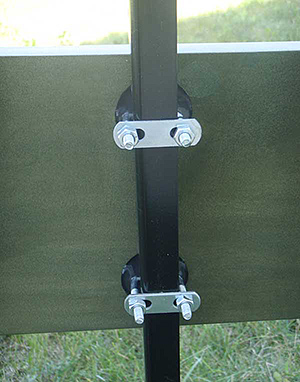
How Atlas Signs and Plaque mounts signs to a fence

Easy once the measuring is complete

Now, if you do choose to order the fence mount, we’ll make your sign installation as easy as possible. And as with most things, the more preparation and information you send, the easier it is for all involved parties. Now, depending on the size of the sign, you might be able to mount the sign on one post. If you do that, we need two dimensions from you: the post depth and the post width. Measure these as precisely as possible. If the fence post isn’t square, tell us and we’ll figure something out.

However, for larger signs, you may need two (or more) posts. If you do, we need another measurement on top of the post width and depth. While you’re out at the fence measuring, find the center of the first post. Next, find the center of the second post and then measure that distance. This is called, somewhat uncreatively, the center-to-center distance. We may also ask you for the distance between posts, just for more information.

We’d recommend making a mock-up of your sign and trying different positions for where you want it. Just get a piece of cardboard that’s the same size as your sign and hold it on the fence. If you have a helper, take some pictures and we’ll work with you. If your fence is strange, definitely take some pictures so we know what we’re dealing with. Remember, the more information we have, the easier the entire process is.

Of course, there are other methods of mounting your plaque. Just click on the above photo to go to the Atlas Signs and Plaques, Installation Page for more sign mounting options.

The fence mount requires careful measurements, but with enough information, we can help you make it look great.

Love This? Go Tell it on a Mountain!

Where Do I Hang My House Numbers Address Plaque?

 Every House Has Room for House Numbers

So you just received your brand new address numbers sign from Atlas Signs and Plaques and you’re ready to show it off to the world. You eagerly review the installation directions and excitedly head outside to hang it. It’s only then that you realize—“I have no idea where to hang this sign”.

Sound familiar? Not knowing where to hang your sign is stress forming and scary—placing it in the wrong spot limits your house’s visual beauty. But Don’t worry; just follow these 6 easy tips and you will do great.

Note: There are (not so) strict building codes that your city employs. Though often unenforced, you may want to review those codes before hanging your sign.

 6 easy tips to remember when hanging your address plaque

1. Visibility
2. Symmetry
3. No on-door hanging
4. Higher than 4.5 Ft., lower than 6 Ft.
5. Hanging to the right of the door is traditional
6. Make sure you’re happy

1. Visibility. The Cardinal rule of sign hanging is to place the sign somewhere it can be seen. The whole point of a sign is to be seen and hiding it behind a tree, bush, or plant, undermines the sign’s effectiveness.
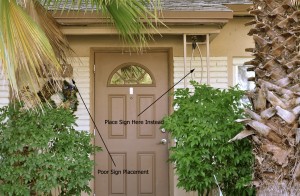
poos sign placement

In this example the sign is hidden behind a palm tree, severely limiting its visibility. Simply moving the sign to the right of the door makes it much more visible in this case.

2. Symmetry. You want your sign to “line up” with other visual cues on the façade of your house. A sign that is off-center can make the entire house look awkward and unappealing.
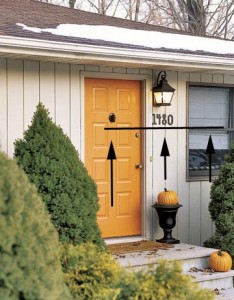
Notice the sign placement in this photo. The sign is placed (roughly) on level with the door-knocker and the window divider to its right. Think of this as lines on a sheet of paper. You wouldn’t start a sentence on one line and then switch to another. Signs are the same way. If there’s a visual cue near your door (doorknob, lock, doorbell, window, mailbox) line up your sign with it and benefit.

3. No on-door hanging. Avoid on-door hanging for address numbers (welcome and phrase plaques are acceptable, however).
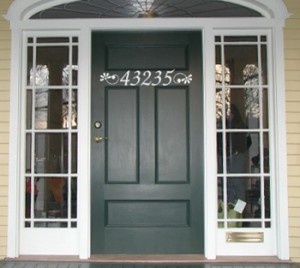
As you can see in the photo, having numbers on the door is a big no-no because they will usually look awkward.

4. Not too low, not too high. Generally you want your sign to hang anywhere between 4.5 ft. and 5.5 ft. high. This is well within the average person’s visual plane and will allow them to naturally view the sign without craning their necks to see it.
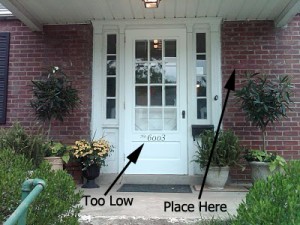
Notice in the picture how a guest on the front porch has to look down in order to see the numbers. By placing the numbers higher, their visibility increases.

5. To the Right. Though not a “rule” in the traditional sense—most house signs are placed to the right of the door. Why that is, I do not know; all I know is most people choose to hang on the right. Remember, there are no guidelines for this–the choice is yours.
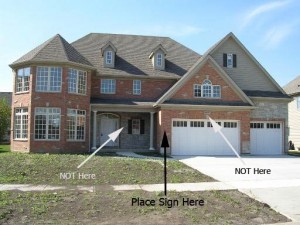
For Most, Hanging on the Right Works Great

6. Make Yourself Happy. If you aren’t pleased then you’re doing it wrong. Don’t overly concern yourself with how you think other people think it looks. That’s silly. If you’re happy with the placement then the sign is well placed.
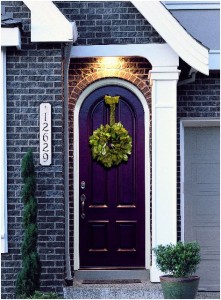
Try Not to Overthink Things

Don’t feel the urge to completely follow these rules because every home is different. Simply following tips 1 and 6 will lead to great results. Good luck and have fun!

Love This? Go Tell it on a Mountain!