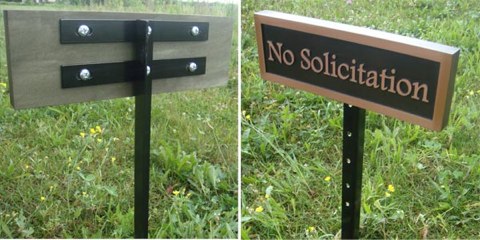
Plaque Mounted on a Ground Stake
It happens. A client orders a plaque mounting system that just isn’t compatible with the mounting surface. What to do? What to do?
Just email Atlas Signs and Plaques. Describe the situation, and send pictures. Send clearly labeled pictures. Send pictures from different angles. Send pictures that include a ruler or some other method for Atlas to determine scale. Send pictures that include the plaque. In short, give Atlas information to work with. Atlas can’t be there in person, so give information such as thicknesses, dimensions, and materials used.
Atlas will do the best possible to make it all work and save the day.
Here is the response from Atlas to a client that was having a mounting issue.
Aloha Vickie. Thank you for your compliment. It was our pleasure to create this plaque for you.
You selected our standard keyhole mounting system which may work with your rock wall either as-is, or with a little modification. Let’s talk about as-is first. We shipped the plaque with screws that are of a length suitable for smooth or slightly irregular surfaces. We often bore these same screws into brick or mortar using a 1/8 inch masonry drill to make a pilot hole. If you are able to do this on an area of your rock wall, it will be easy. I would suggest a bit of construction adhesive around the screw head and between the sign and rock wall in places that will contact the plaque.
If your selected mounting area is very irregular, you might modify the above method a little by using longer screws. Spacing of the screw heads is critical and that is why we include a mounting template. But this is going to be difficult when using longer screws. So you might try getting longer screws and use construction adhesive to first secure the screw head into the keyhole hangars that are currently mounted to your plaque. You would then drill oversize holes into your rock wall and fill them with adhesive or a mortar mix intended for securing fencing to concrete or rock. What you would be doing here is roughly converting the keyhole method into the stand-off mounting system. This is illustrated on our installation page http://atlassignsandplaques.com/installation.aspx, This will approximate the stand-off method, but will likely not be as secure. Again, using adhesive where the plaque and rock touch would be a good idea.
These are just some ideas that are sent without benefit of being at the site, so we can’t make any guaranties about the method or our suggestions. I realize that shipping is expensive, but an alternative would be for you to pay shipping both ways and return the plaque to us. We would convert to the stand-off mounting method and get it right back to you.
Errors and mistakes happen. If it the fault of Atlas Signs and Plaques, it will be corrected without cost. If the error was made by the client, Atlas will offer advice to help, or possibly modify the plaque to make it work.
Love This? Go Tell it on a Mountain!


